Eight slots and no drop button
Your bag has eight slots, and the game has no way to throw anything away. A slot frees up only when you use up what is in it: shoot the ammo, take the medicine, throw the flashbang or hand the item to your partner. If the bag is full, a pickup fails with “Bag is full (Tab to organize)” and the item stays on the floor.
Each gun and each ammo type takes its own slot, and stacks have caps: 36 pistol rounds, 18 shells, 60 rifle rounds, 16 plasma cells, 4 Painkiller Shots, 2 First Aid Kits, 4 batteries and 3 flashbangs. Keys, fuses, cards and the decoder go on a key ring the two of you share, so they never take a slot.
Solo, this decides your route. You start with the K5 Pistol, 12 spare rounds and one Painkiller Shot. Keep one of every kind of item chapter 1 offers and the bag is exactly full: pistol, pistol ammo, shots, shotgun, shells, flashbang, First Aid Kit, battery. The forest then offers four more slots’ worth (rifle, rifle ammo, plasma cannon, cells). Spend a battery or a flashbang before you reach the Keeper’s Cabin, and don’t carry more than 36 spare pistol rounds, or they spill into a second slot.
The weapons in numbers
Weapons found on the map come with a full magazine. Per hit, body damage and the head multiplier are:
- Combat Knife: 30, swings every 0.55 s, reaches 1.9 m from the enemy’s edge within a wide arc in front of you. It makes almost no noise (2 m) and kills any unaware enemy except Brutes, Tentacles and the Queen outright.
- K5 Pistol: 20, head ×2.5 (50); 12 rounds, 1.5 s reload, heard 18 m away.
- Pump Shotgun: 9 pellets of 12 (108 if all land), head ×1.6; 6 shells, 2.6 s reload, range 22 m, heard 30 m away.
- K2 Rifle: 16, head ×2.2 (35); 30 rounds fully automatic, 2.1 s reload, heard 26 m away.
- Alien Plasma Cannon: 90, head ×1.5 (135); 8 shots, 2.4 s reload. Each shot also burns other enemies within 3 m for up to 45, and a plasma kill never fakes death.
How many hits each enemy takes
Enemy health solo, then in co-op where it rises 15% (35% for the Brute and the Queen): Infected 70/81, Crawler 45/52, Runner 55/63, Listener 110/127, Spider Parasite 26/30, Stalker 130/150, Brute 520/702, Tentacle 160/184, Queen 4,200/5,670. With the pistol that works out to:
- Infected: 4 body shots solo, 5 in co-op; solo, a headshot plus one body shot also does it.
- Crawler: one headshot solo; it sits low, so aim down.
- Spider Parasite: one headshot or two body shots, in both modes.
- Listener: 6 body shots solo, 7 in co-op. Its bite does 55, so two bites put you down from full health.
- Stalker: 7 body shots or 3 headshots solo.
- Brute: 26 body shots solo. A full shotgun magazine of six point-blank shots is 648, enough solo but not for 702 in co-op; with the plasma cannon it takes 6 body hits solo and a full magazine of 8 in co-op.
Aim before you pull the trigger
Holding aim halves a gun’s spread and moving multiplies it by 1.3, so stop and aim for anything that matters. Aimed and standing still, a pistol round lands within about 9 cm of the crosshair at 10 m; an Infected’s head is 20 cm in radius. The cost is speed: you walk at 1.9 m/s while aiming against 3.0 normally and 5.4 running.
The shotgun shows the difference best. At 5 m its pellets scatter up to 50 cm from the crosshair from the hip and 25 cm when aimed. Against an Infected, whose body is 42 cm in radius, that is the difference between all nine pellets landing and roughly three in ten missing.
Chapter 1, room by room
The Omega Research Facility runs on triggers, and knowing them turns surprises into plans.
- Elevator Hall: read the shift log before you leave. Opening the hall door makes the corridor light flicker, and an Infected stands under the red light. Kill it with a gun and HQ warns that the shot carried; another Infected from the east end comes to check.
- Guard Room: a save terminal, 12 pistol rounds, the whiteboard and a sleeping Infected, which is your first free stealth kill. The whiteboard tells you how to turn a date from the shift log into the Armory code.
- Armory (optional): the Pump Shotgun, 12 shells and two of the game’s four flashbangs.
- Storage: a fuse and a battery. The vent rattles when you open the door, and picking up the fuse drops two Spider Parasites.
- Infirmary: an awake Listener and a sleeping Crawler, which cannot hear corridor gunfire until you open the door. Crouch with the light off. The Blue Security Card, two Painkiller Shots and the medical record are here.
- Sector B Lab: the second fuse, the research log and a wandering Infected. Walking between the tanks breaks one and releases a Stalker.
- Generator Room: both fuses restore power, which sounds the alarm. Two Infected crawl out of vents after 2 s, a Runner after 5 s and a Crawler after 8 s. Head for the Control Room: save terminal, First Aid Kit and the two levers.
- Quarantine Wing and Vault: HERMES’s answers are in the research log and the medical record. Taking the decoder kills the lights, frees the Brute and sets a checkpoint. You don’t have to kill the Brute; the exit only needs the decoder and both of you on it. In the tunnel a Spider Parasite drops, with a Runner 1.2 s behind it.
Your flashlight is on a timer
A full battery lasts 9 minutes with the light on, and a battery item adds 50%, or 4.5 minutes. You can’t use one above 99%. Chapter 1 places one battery and chapter 2 two; chapter 3 places none. Your par time for chapter 1 is 20 minutes, and its start and one battery give you 13.5 minutes of light, so switch off wherever there is light already. From the generator until you take the decoder, the facility’s own lamps are on. If anyone’s battery falls below 20% while neither of you carries a spare, about half of what enemies drop becomes batteries.
Chapters 2 and 3: prepare before you commit
In The Black Forest, the Keeper’s Cabin holds a save terminal, the K2 Rifle with 30 more rounds and a First Aid Kit; the hunter’s post has another kit and two batteries. At the crash site, collect the Alien Plasma Cannon and its 8 cells before plugging in the decoder. The socket can’t be undone, and it saves the checkpoint with whatever you carry at that moment. The 45-second hold then brings a Spider Parasite and an Infected at 3 s, Runners at 10 s and 26 s, a Stalker at 18 s and a Brute at 32 s. The Brute only has to be survived for 13 seconds.
In The Mothership Heart, the antechamber between the nerve-node rooms and the Heart has a save crystal, two First Aid Kits, 8 cells, 45 rifle rounds, 12 shells, 24 pistol rounds and two flashbangs; the arena, whose door closes behind you, has another kit, 8 cells, 10 shells and 30 rifle rounds. If every round hit the body, the ammo placed in chapter 3 adds up to about 6,000 damage. Cutting all eight tentacles and killing the Queen takes 5,480 solo and 7,142 in co-op, and tentacles and the Queen drop nothing. Bring ammo from the forest and aim for the Queen’s head.
Healing and fighting the light-shy
A Painkiller Shot restores 25 health and a First Aid Kit 60. H chooses for you: missing 40 or less, it uses a shot first; otherwise a kit. It refuses at full health, so nothing is wasted by pressing it.
Stalkers and Spider Parasites flinch from light. Aim with the flashlight on and point the beam straight at one within 11 m and it staggers for 0.75 s, at most once every 6 seconds per enemy. A Stalker only spits from beyond 3.5 m, 14 damage at 16 m/s, aimed where you stood when it spat, so one sidestep is enough. The Queen’s fans of acid work the same way.
Playing as a pair
A downed agent bleeds out after 45 seconds. Holding E within 1.8 m for 3 seconds brings them back with 35 health, and every enemy attack on the downed body takes 8 seconds off. Enemies choose the closest target but treat a downed agent as 8 m farther away, so they come for the reviver first: clear the room, then kneel.
Handing over an item needs you within 3 m and room in your partner’s bag. Split the guns so neither bag carries four ammo types. If your partner does bleed out, the run continues: lever windows switch to the solo timing, and they return at the start of the next chapter with at least 50 health.
Common mistakes
- Picking up every stack early, then finding no room for the rifle or the plasma cannon.
- Taking the Listener head-on: six pistol rounds against a 55-damage bite.
- Shooting the Brute during the escape instead of running for the tunnel.
- Plugging in the decoder with an empty magazine; the checkpoint keeps it that way.
- Leaving the light on in lit rooms and meeting chapter 3 with a dying battery.
Play it yourself
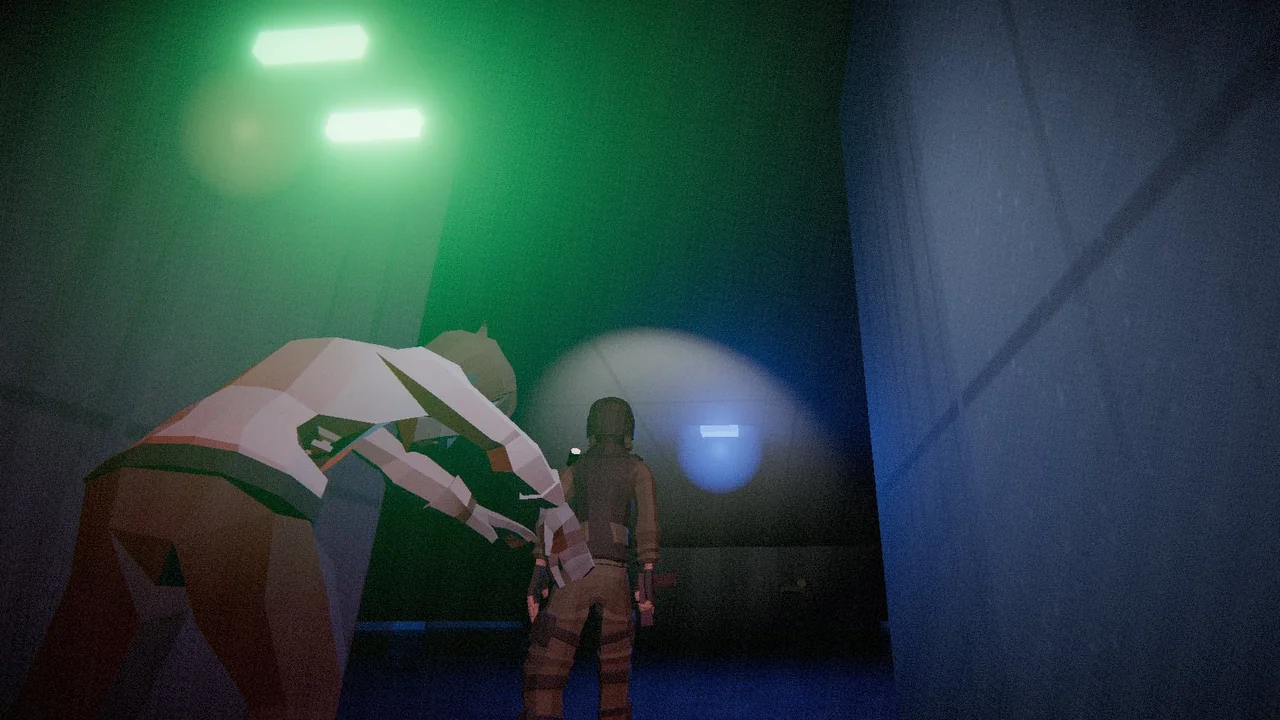
U.F.O
Explore a silent 3D research base, survive the infected and solve its mysteries alone or with a friend.